 Gusset
Documentation › 3D prints and layered materials
3D prints and layered materials
A 3D print is weaker between its layers than within them. Gusset checks both, so it can tell you which way up to print a part.
Setting up a printed part
- Open Material and choose a printed material: PLA, PETG, ABS or Nylon PA12.
- Set Stacked along, the direction the layers are built up in. The easiest way is The face that lay on the print bed (click it): choose it, then click that flat face in the view. You can also choose X, Y or Z, or type a direction.
- Accept, then hold, load and solve as usual.
While the Material panel is open, the view draws three layers and an arrow through them at the middle of each such part, so you can see the direction it has.
Left to the program, the layers are taken to be stacked along the part's thinnest way. That is right for a sheet and only a guess for a print, so set it yourself. The results carry a note whenever a direction was guessed.
What the results show
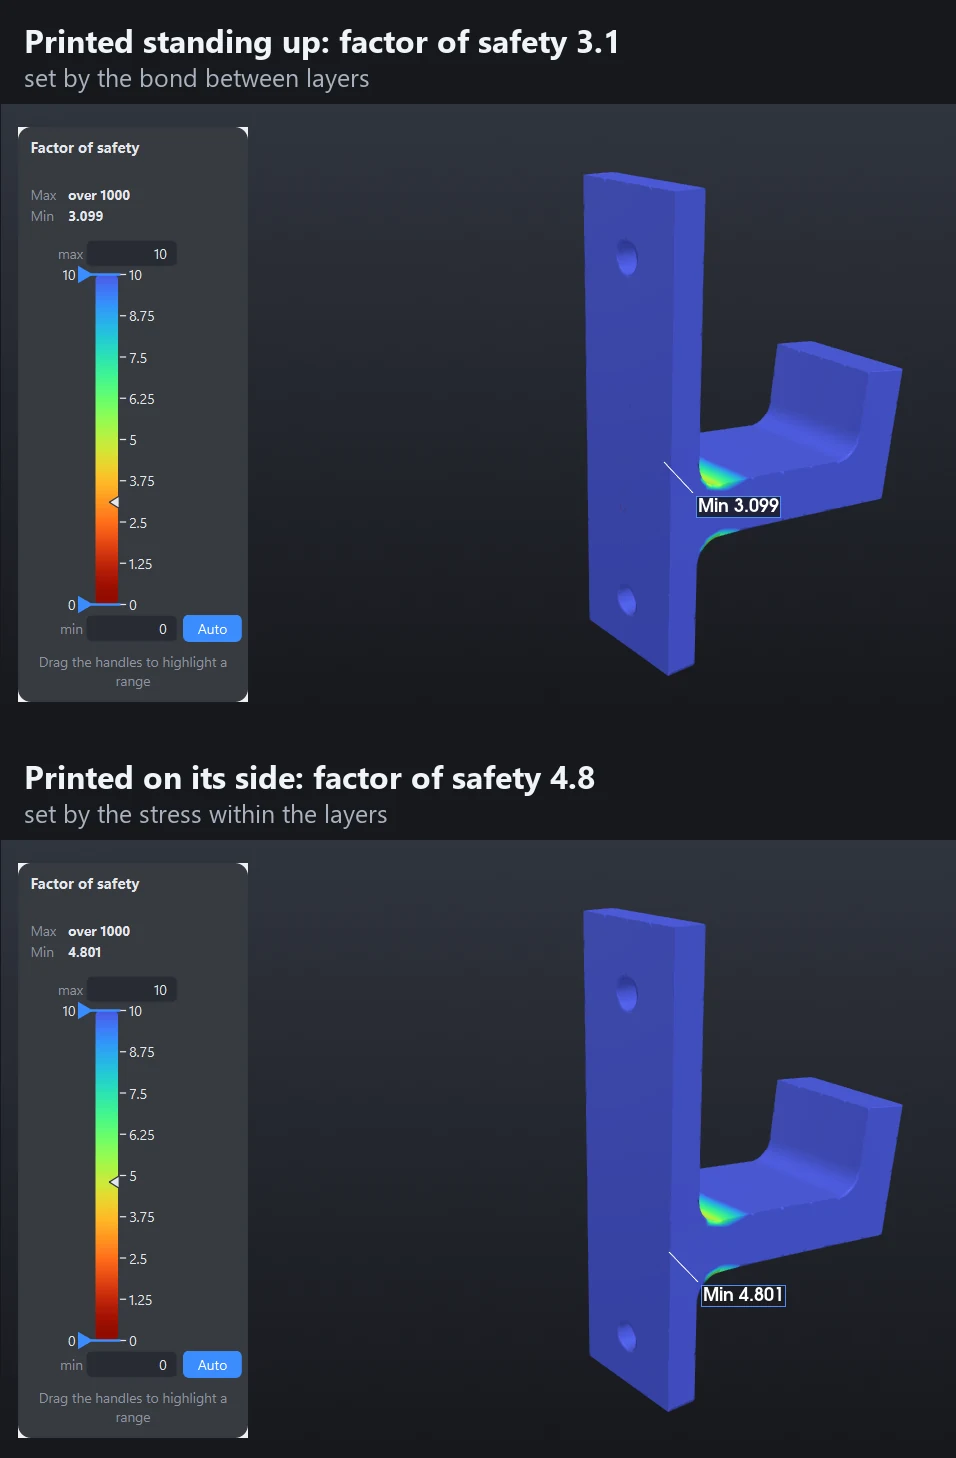
- Factor of safety is the lower of two checks: the stress within the layers against the material's strength, and the bond between layers, pulled apart and sheared. Pressing layers together does not count against the bond. The Summary table and the report say when the bond governs.
- Stress across the layers and Shear between layers are plots of their own, under the arrow beside Stress.
To choose an orientation, solve the part once for each way up and compare the factor of safety. A part is strongest when its layers run along the main pull, not across it.
The built-in values, and measuring your own
The built-in values are typical ones for parts printed solid. A print's strength across its layers depends on the printer, the filament and the settings, and can differ a good deal. When the answer matters, measure it.
Measure it yourself, in the Material panel, needs a printer and a kitchen scale:
- Save the test bar from the dialog and print ten: five lying flat and five standing on end, with the settings the part will have.
- Break each across two supports 80 mm apart, pressing down in the middle over the scale, and note what the scale read when it broke.
- Type the readings in. Gusset works out the strength within the layers and of the bond, and fills in the material's boxes. A strip hung off the edge of a table gives the stiffness as well.
Help › Measuring a 3D print's strength opens the guide, with pictures of each step.
What is not modelled
- The part is taken as solid, with one stiffness throughout. Infill patterns, perimeters and voids are not modelled.
- Tension and compression are taken as equally strong. Give the lower.
- These materials break rather than yield, so a peak stress is not forgiven as it is in steel. Solve at Accurate where a hole or a fillet governs.
Plywood and carbon fibre sheet (experimental)
Birch plywood and two carbon fibre sheets are in the material list, marked experimental. They have a grain as well as layers: tick With a grain within the layers and set Grain along.
- Deflections, and stresses away from holes, are checked against known answers.
- The peak stress at a hole comes out about 6% low at Standard and within half a per cent at Accurate on the two plates tested. Use Accurate or more.
- The sheet is one material through its thickness, with no single plies.
- Holes in bending, notches and holes near an edge in these sheets have not been compared with anything.
Results on a part of one of these materials carry a note saying what is checked and what is not. The figures are on the accuracy page.
Something wrong or missing on this page? Tell us.