 Gusset
Documentation › Your first study
Your first study
From the installer to a stress plot you can trust, in about ten minutes. Use your own STEP file, or the sample model that comes with the program.
1. Install and sign in
- Download the installer and run it. It needs Windows 10 or 11, 64-bit, and about 2 GB of disk. It installs for you alone, so it does not ask for an administrator.
- Start Gusset from the Start menu.
- The first time you solve, Gusset opens your browser so you can sign in, with Google or with a link sent to your e-mail address. The account is free and there is no password. See Account and licence.
Windows may show “Windows protected your PC” when you run the installer. Choose More info, then Run anyway. See Troubleshooting.
2. Open a model
Choose Open on the Study tab (Ctrl+O), or drop a file onto the window. To try the program without a model of your own, choose Help › Open the sample model.
Gusset asks how you want to start:
| Choice | What you get |
|---|---|
| Just open it | The geometry and nothing else. You set the material, joints, fixtures and loads yourself. |
| Guide me through it | Five steps in the side panel, each one yours to confirm: Joints, Material, Hold it, Load it, Solve. |
| Set it up for me | Touching parts bonded together, steel S355 on every part and Draft accuracy, for a first answer quickly. You add what holds it and what loads it. |
For a first study, choose Guide me through it. The same box asks which way is down in your model, so that gravity pulls the right way if you switch it on. Models from SolidWorks usually have −Y down.
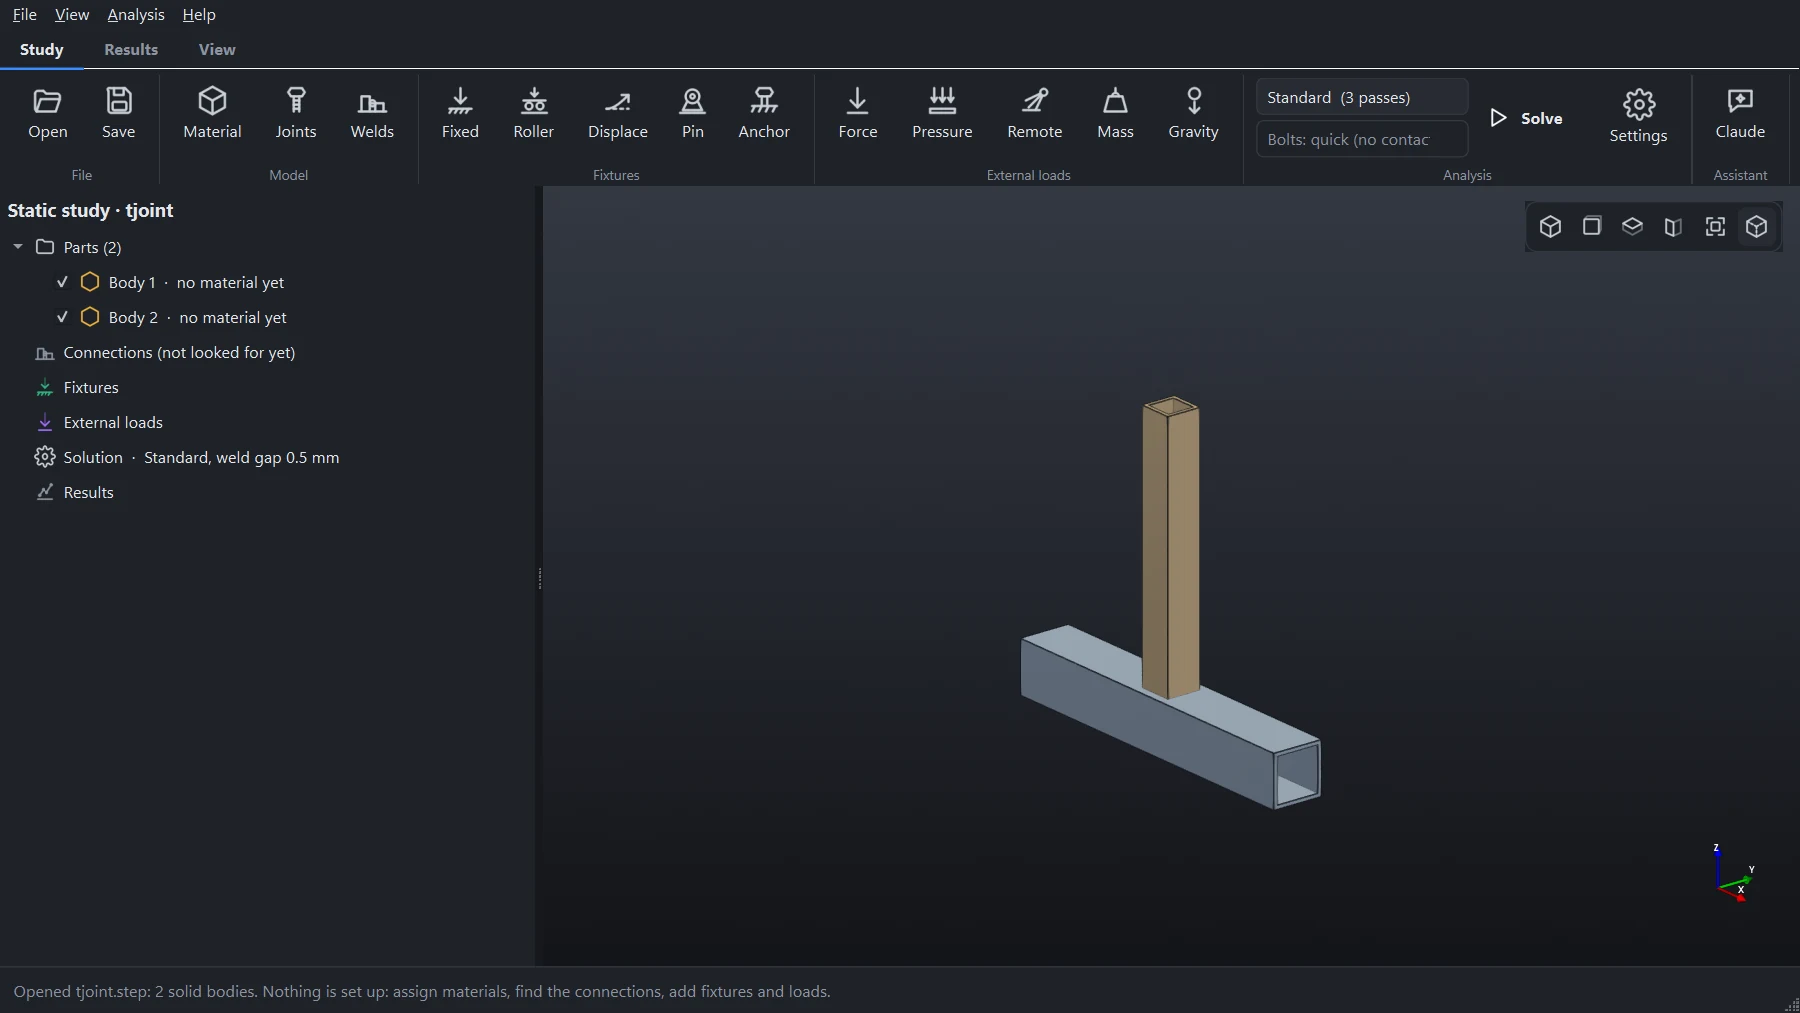
3. Set the study up
A study needs four things. The guided setup takes you through them in order; without it, the same buttons are on the Study tab.
- Joints. Parts that touch are bonded together, which is right for the stress in the parts and for deflection. If you want the welds and bolts themselves checked, see Joints.
- Material. Choose one for every part, or different ones for some. See Materials.
- Hold it. Choose a kind of fixture, then click the faces it holds. Fixed on the faces that are bolted or welded down is the usual start. See Fixtures.
- Load it. Choose a kind of load, click the faces it acts on and type its size. A force is the total over the faces you picked. See Loads.
Click a face to pick it; Ctrl-click adds another. In a panel, the green tick (or Enter) accepts and the red cross (or Esc) cancels.
4. Solve
Leave the accuracy at Standard (3 passes) and choose Solve (F5). The status bar names each step and estimates the time left. A frame of a few dozen members takes from seconds to a couple of minutes at this setting.
5. Read the answer
When the solve finishes, the window shows the von Mises stress on the deformed model.
- Look at the verdict first. A band over the results says Converged, Nearly converged or Not converged. If it is not converged, choose Solve one pass more. A model that is too coarse is too stiff, so its deflections and stresses come out low.
- Safety on the Results tab plots the factor of safety against yield. Displace plots how far it moves.
- Summary opens a table with the mass, largest displacement, largest stress and lowest factor of safety of every part.
- Report (Ctrl+R) writes all of it as a web page or a PDF.
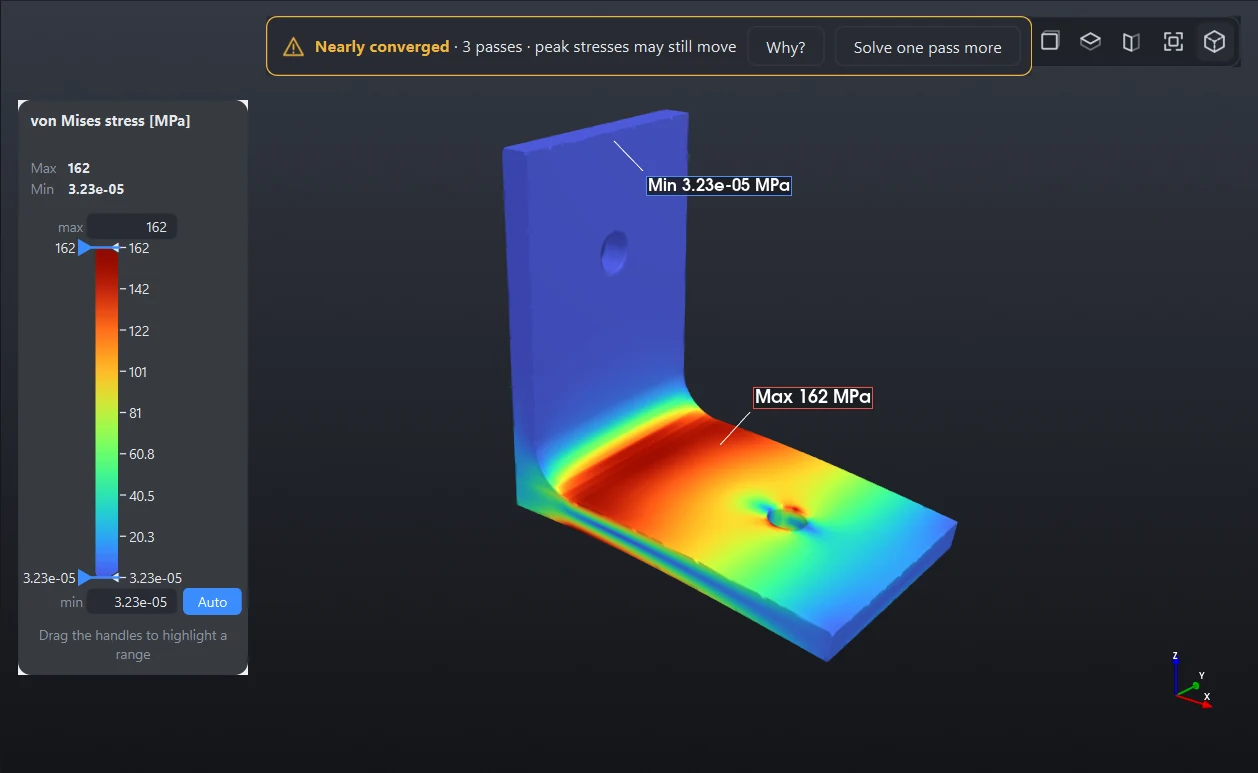
Save the study with Ctrl+S. Next: Reading results explains what each plot and number means, and Solving and accuracy how far to trust them.
Something wrong or missing on this page? Tell us.